
My friends often ask me, ‘How hard is it to make a website?’ As a web developer, I always tell them it’s really hard :D. It doesn’t matter if a website looks complicated or deadly simple, it always costs a web developer so much time and effort to build. That is because there are just so many details we need to worry about.
But sometimes my friends reply, ”I just want to have a website of my own for fun. Is it really that hard?” Well, in that case, I have to say it’s really not. Nowadays, having your own space on the internet to share your life stories with people all over the world is extremely easy.
To make your first personal website doesn’t mean you have to build it from scratch by yourself. All you need are three things: a computer with internet connection, money and time. If you are reading this, then you already have the first thing done. So, get your credit card ready and follow my instructions, and you can have your own website in an hour or less.
First things first, what you are about to learn is NOT the only way to do this. There are always other options and possibly better options. My purpose today is to show you a quick example so that I will not explain about my choices in each step. If you want to discuss those or have questions, please leave a comment below.
Let’s get started!
Step 1: Find Web Hosting
Web hosting is going to be the your home on the internet. Open your web browser (IE, Chrome, Safari, etc) and go to www.godaddy.com. GoDaddy is a web hosting service provider which can rent you some space on their server so you can build your website in it. Compared to purchasing your own server, renting from GoDaddy is a much cheaper and more suitable way for hosting your first website.
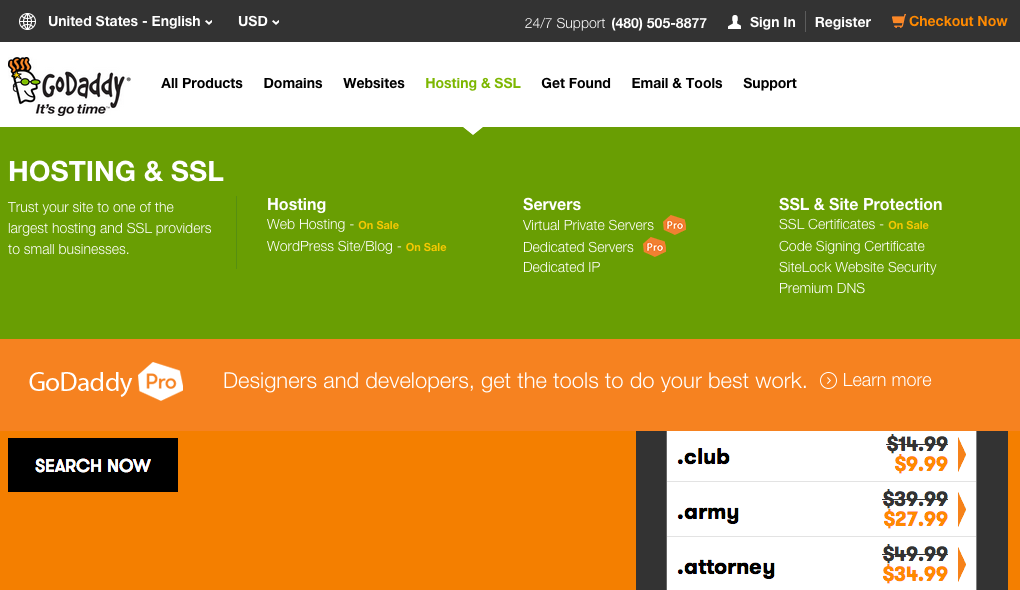
Click on ‘Web hosting’ under the ‘Hosting’ menu to open the web hosting services page. Find ‘Economy Hosting’ plan and add it to cart. Continue to the next step without customizing your web hosting plan. (“Economy Linux Hosting with cPanel” should be the selected plan in this case.) You can change it later if you need to upgrade or add options.
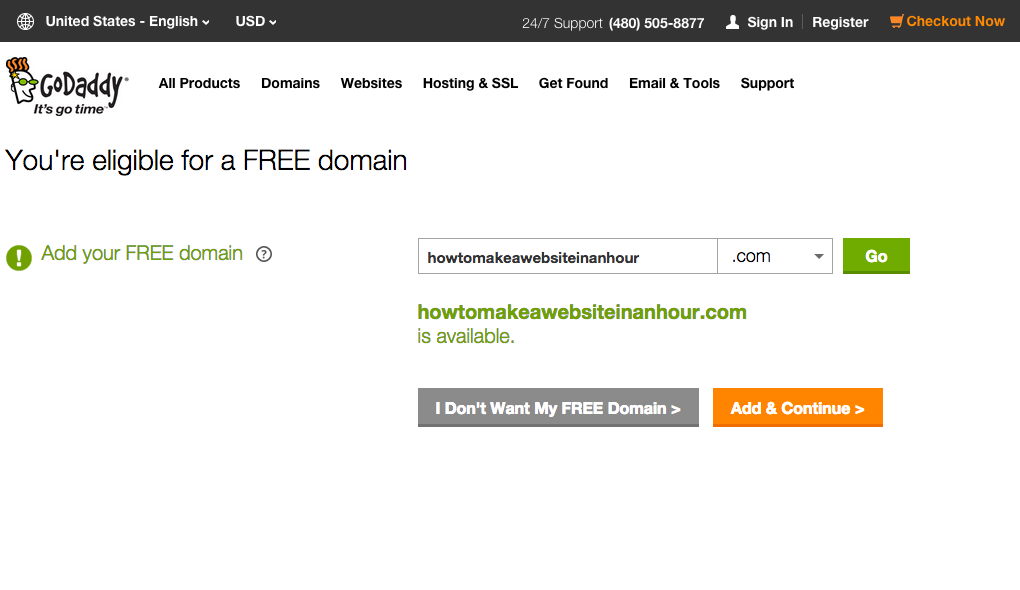
Step 2: Choose a Domain
The domain will be your home address on the internet. It has to be unique and should be easy to remember so that other people can find you. Choose a wise one and click the ‘go’ button, if the domain has not taken by other buyers, you can add it to shopping cart and continue to checkout.
Step 3: Create a Hosting Account
Before checking out, it’s time to create an user account and let the hosting company know who you are. Your username and the password will be the only way to access your hosting service. Please keep this information in a safe place.
After you created your user account and paid for the services (hint: search online for coupons), please click on the ‘View Hosting’ button on the confirmation page or go to ‘My Account’ -> ‘Manage Hosting’ in the menu on top of the page. The new hosting account you just purchased should be listed in here waiting to be set up.
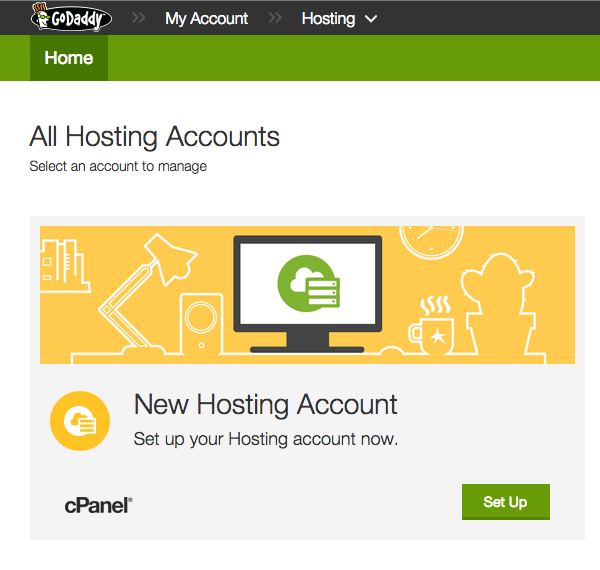
Step 4: Set Up Your Hosting Account
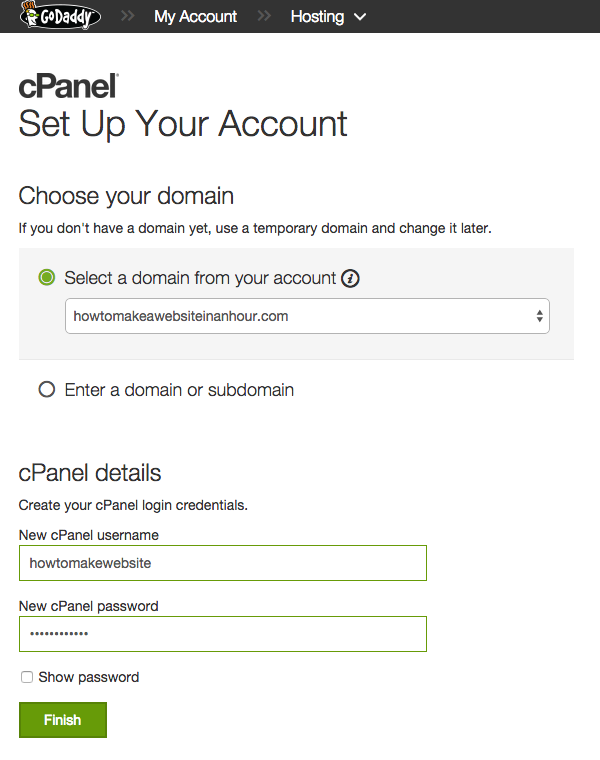
Click on the ‘Set Up’ button and then select your new domain in the drop down menu. Follow the instructions to create your cPanel login credentials and keep them in safe place. (For security reason, the cPanel login credentials should be different from your GoDaddy login credentials). Click the ‘Finish’ button and the cPanel will be ready for you to use in a minute.
Step 5: Install and Setup CMS
The CMS, or content management system is what you will use to edit and publish the content on your website. With the help of CMS, you can avoid the hassle with HTML, CSS, Javascript or any other tricky things us web developer dealing with everyday. If the website is your house, then the CMS will be the house plan. A good CMS can make your website more space efficient and more convenient to use.
Find and open ‘WordPress’ in the web application section of your cPanel, then click ‘install this application’. GoDaddy will now build your house with the most popular content management system in the world.
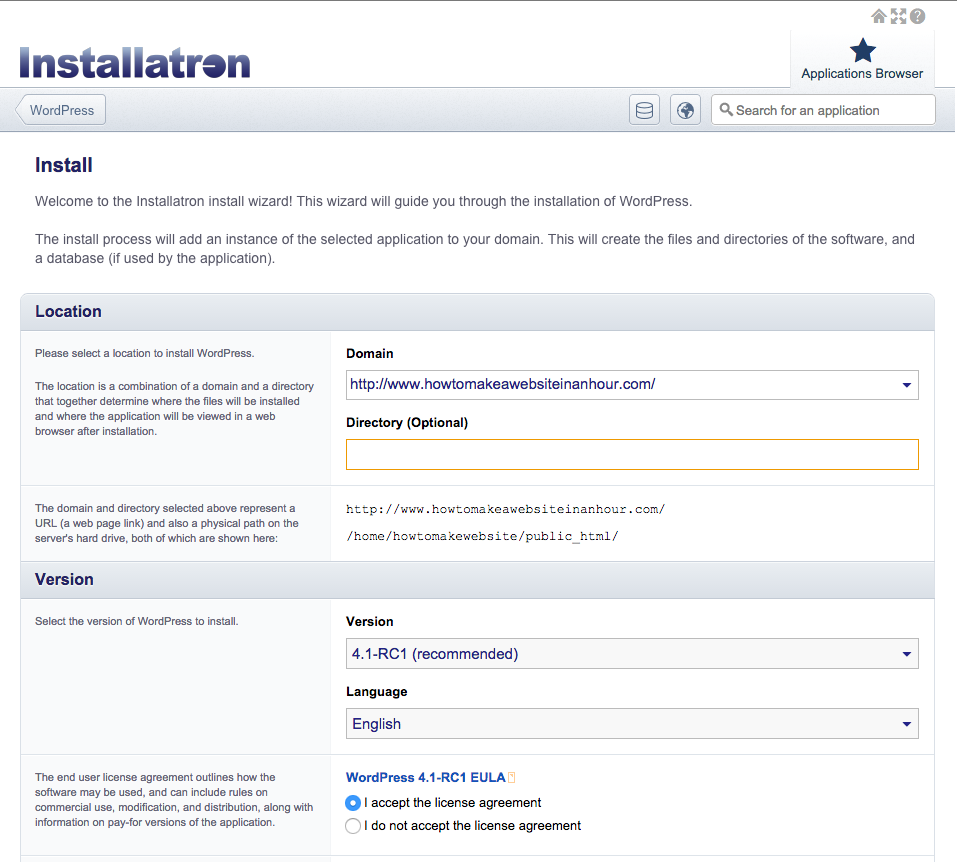
Most of the fields on the install page are good with default values. Go to the settings section and pay attention to the administrator username and password (Click Show Password to reveal the password). This set of username and password is like the key to your house, you are going to use them everyday. Change them to whatever you’d like and remember them if you can. Disable two-factor authentication if you don’t plan to use a smartphone to access. Click ‘Install’ button at the bottom when you are ready.
Step 6: Enjoy Your Website
If you can see the page below, you already have your own website. Open the first hyperlink (your domain) to take a look at it. It’s simple and clean, just like a new home 🙂
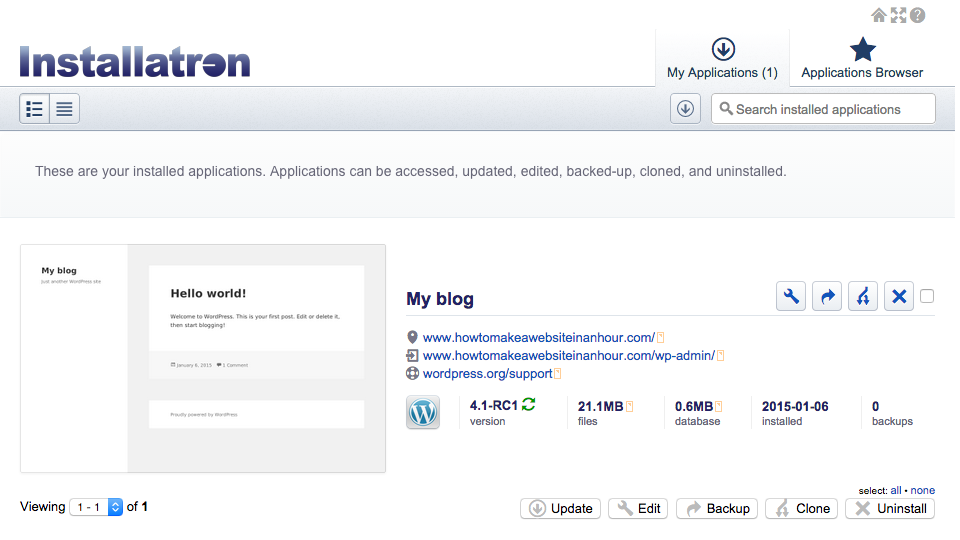
The second link is for the administrator panel. You can log into that with the administrator username and password created from previous step and manage everything on your website.
Sum It Up
Today, you spent approximately an hour of your time and $12 to $100 of your money (depends on how good are you at finding discounts) on making your own website. Let’s review the new things you created.
1. A domain (good for a year)
2. A web hosting account (good for a year)
3. A WordPress web site (good until you delete it. Even your hosting services ended, you can still keep your website locally and find another hosting later)
4. Three sets of login credentials: GoDaddy login, cPanel login and WordPress administrator login (All good until you lose them. Do not lose them!)
And some knowledge of how to quickly set up a website. This process will still be similar if you choose other popular web hosting service providers like Bluehost or HostGator.
A New Chapter
Now that your new website is waiting for you to use it, the whole world is waiting for you to share your knowledge and stories. Now get into admin panel and start posting! : )
WordPress is very user friendly and easy to learn. If you have any questions about how to use WordPress, please leave a comment below.